
|
|
|
Link to us
 Equipment
     
|
Tutorials - How to find our serversSome of you have had trouble finding us. Here's how to go about it in mIRC. 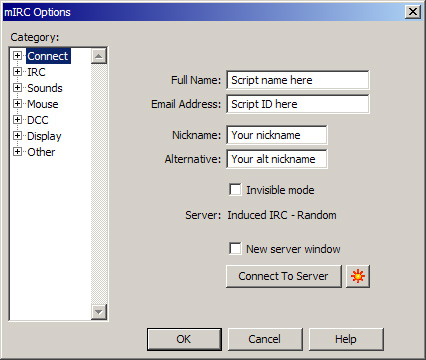 In the above screenshot you are shown mIRC's main control panel and is accessed by clicking the second button from the left in the mIRC toolbar (or using ALT + O if you are one of those primitive people that refuse to use a meese). Included are spaces for your full name, email address, your chosen nickname and an alternate nickname. We recommend that you never put your real name in the fullname setting and there are some important reasons for this. What you put here is included in your 'whois' information on the server. If you use a script then it is likely that this setting contains the brand of the script. If this is the case then simply leave that be, otherwise put something there that does not allow someone to personally identify you. Apart from those you know and trust there is no need for others to know who you are. Likewise, the email address setting does not have to contain your real email address. Unless you use a script which fills this information out for you, just put any single word that comes to mind here. Make it something that does not personally identify you. The nickname setting simply contains the nickname you like to connect with. The alternate nickname is a reserve nickname which mIRC connects with if your normal nickname is in use, ghosted, etc. If you try to connect with any of these spaces blank then the connection is likely to fail. 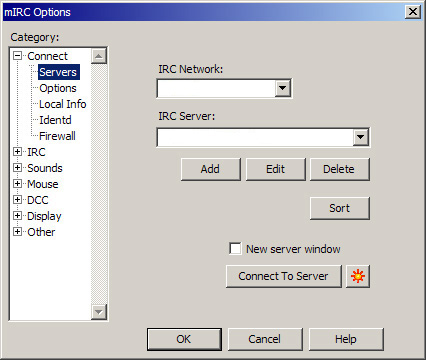 After you have filled out those four fields, look to the list on the left and click on 'Servers'. Then in the middle of the dialogue there is a button called 'Add'. Give that a bash and the following dialogue will appear on top of the existing one. 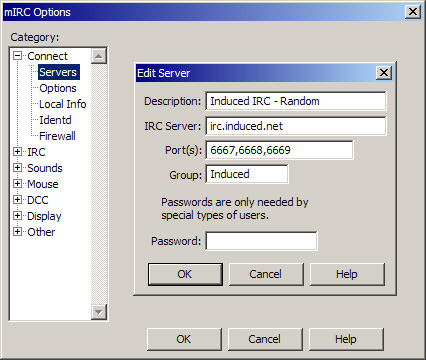 There are four fields that need to be filled out. Leave the one labelled 'Password' blank as a password is not required to connect to our network. Fill out the top four fields exactly as shown. These settings are very important and I will explain why in a minute. When you have done this, press 'Add'. Once this is done, you'll have added the first of our three servers to a group setting which mIRC will remember. 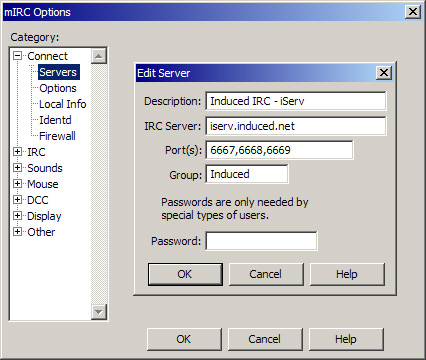 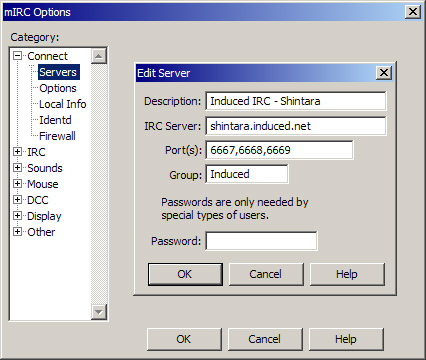  Repeat the process again for our other servers. Note how the last two settings are the same as the first time you did this. This is also important to get right. Once again, fill out all the details exactly as shown otherwise this function will not work. Once finished, click the 'Add' button. What you have done here is ask mIRC to remember some settings that will allow you to connect to our network each time you want to use IRC. Settings for other networks can easily co-exist here, the big difference being that you would include other servers in their own groupings. If for some reason you get cut off, mIRC will try to reconnect and if that fails it will try to connect to the next available server in the group. This makes life easy in the case of a netsplit or server failure which none of us like but do happen now and then. 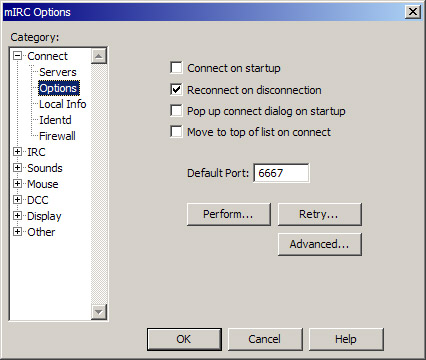 Okay, now click on 'Options' in the left list as highlighted above. Tick the 'Reconnect on disconnect' checkbox. This kickstarts the reconnection process that I mentioned in the previous paragraph. After this click the 'Retry' button in the middle of the dialogue. Another smaller dialogue will appear on top, as shown below. 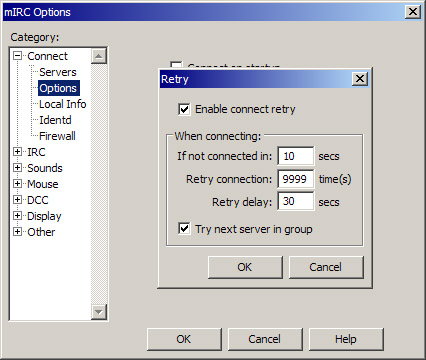 These settings tell mIRC how to go about reconnecting if you get cut off. The settings are not set for a particlar network but work for every network group that you set up. It makes life easy. Please use the settins as shown here for maximum efficiency and impact in the event of a disconnection. 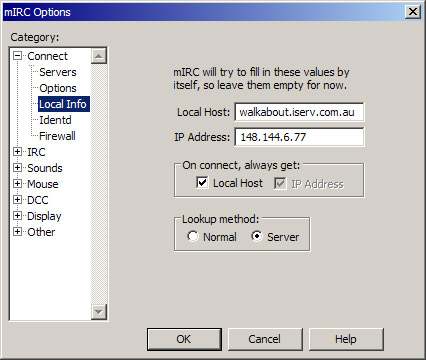 Don't worry about filling out this section because mIRC will do it for you. To make DCC work, make sure that both the check boxes are ticked and that the radio button is set to 'Normal' for direct connections and 'Server' if you operate a home network. At times, home networks do restrict the use of DCC and this is because of the Network Address Translation protocol in your router which masquerades your local addresses so they cannot be seen from other machines on the public network. 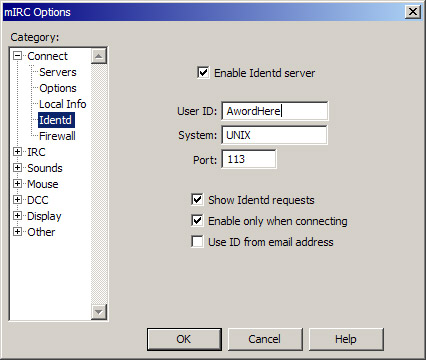 The settings above set up your Ident Server. Ident is not currently required to connect to our network though many networks do require it. It is best to have it on just incase we change our mind though this would only happen in the rarest of circumstances. Be prepared anyway. Tick the top checkbox then if there isn't already a single word of ten or fewer characters in the 'UserID' field you can fill out this field. Only the first word will be accepted by the IRC server and it must be ten characters or less. It is very important to leave the 'System' and 'Port' settings alone. The settings for these should be "UNIX" and "113" respectively. Under these settings there are three more checkboxes. Tick the top two of these and leave the bottom one off. 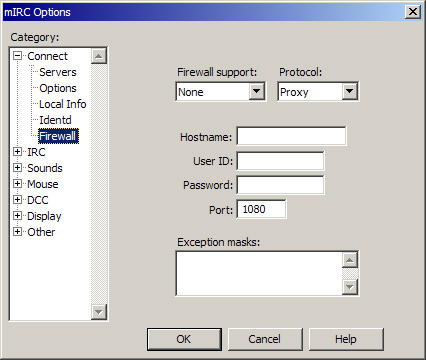 VERY IMPORTANT: Do not enable anything on this part of the dialogue. This section is used for those on a LAN to run mIRC through a firewalled proxy. If you understand what this means then you won't need any assistance with settings in this area. If you don't understand then it is very unlikely you'd be running a proxy server on your LAN. This section can also be used to 'spoof' your real IP address by connecting through unsecured proxy servers, usually owned by other people. This is against the law and also breaches the acceptable use policies of many ISP's and all IRC networks. Leave this section just as you found it and all will be well. This concludes the setup procedure that will get you chatting on our network with the minimum of fuss. |